0%
Docs_ > Importing Source Tables via pg_dump
Importing Source Tables via pg_dump
Instead of manually adding source tables by entering schema_name, table_name, and column specifications, you can streamline the process by importing multiple tables at once using pg_dump.
On the source table creation page, select "Import Source Tables" to open the file explorer. Choose your dump file, and all source tables will be uploaded automatically.
.png)
Exporting Source Tables
Prerequisites:
- PostgreSQL database
- Database credentials and permissions to access and export source tables
- psql installed on your system (Download here)
- (Optional) pgAdmin for GUI-based schema export
Exporting source tables through the terminal
1. Open up a terminal.
2.1. Run this command to export all tables in the database schema:
pg_dump --schema-only -U <user> -h <host> -p <port> -d <database_name> > <directory\filename.sql>
Example:
pg_dump --schema-only -U postgres.user -h aws-0-eu-central.com -p 6543 -d postgres > C:\Users\User\Desktop\dump.sql
This command creates a schema-only dump file and saves it to your specified location (such as the Desktop on Windows).
2.2. To export specific tables only, use the --table flag for each table:
pg_dump --schema-only -U <user> -h <host> -p <port> -d <database_name> --table=<schema_name.table_name> ><directory\filename.sql>
Example:
pg_dump --schema-only -U postgres.user -h aws-0-eu-central.com -p 6543 -d postgres --table=public.books --table=public.authors > C:\Users\User\Desktop\dump.sql
This creates a dump file containing only the specified tables (books and authors from the public schema).
Exporting Source Tables Through pgAdmin GUI
1. Launch pgAdmin.
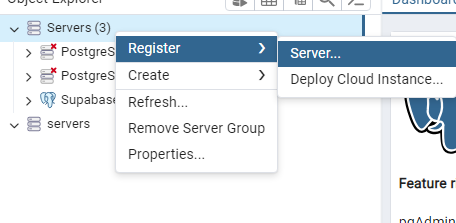
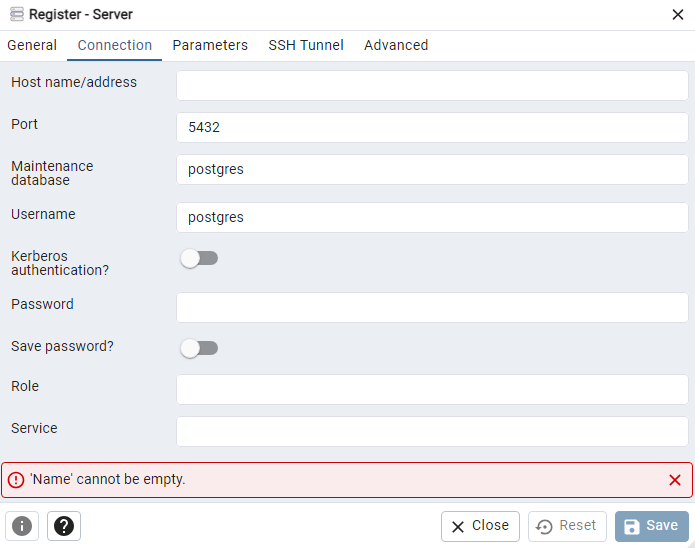
2. Register a PostgreSQL server by clicking register → server and entering your connection details.
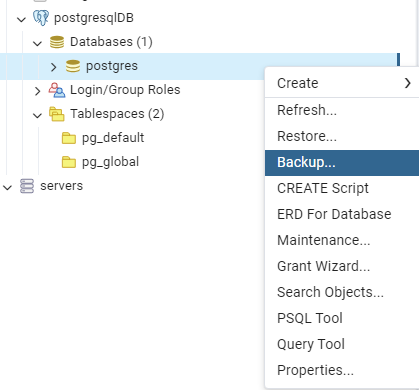
3. Once registered, you'll see your server and database (postgres in this example). Right-click the database and select "Backup".
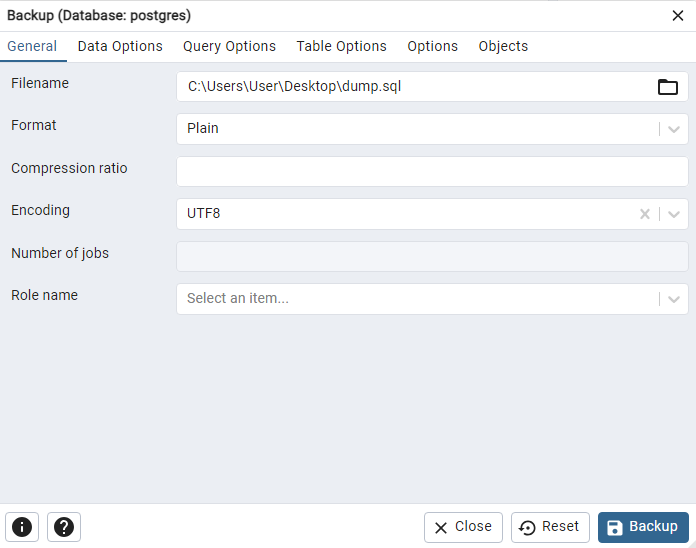
4. In the General tab, specify the dump file location, set format to "Plain", and choose UTF8 encoding.
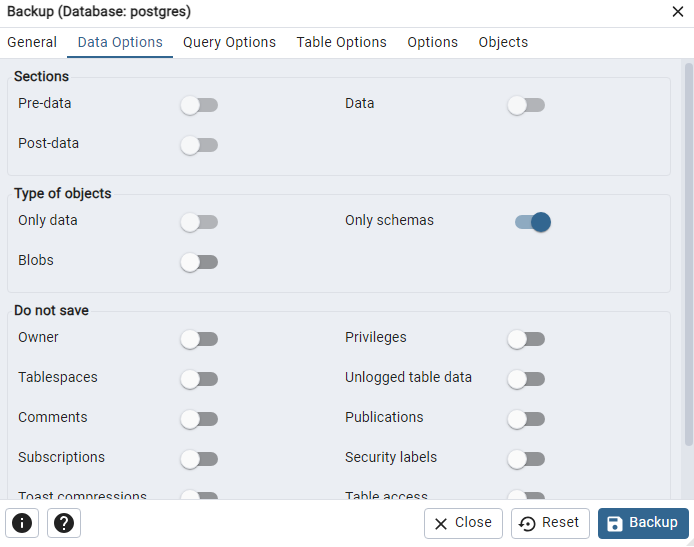
5. Under Data Options, select "Only Schemas" and disable the "Blobs" toggle.
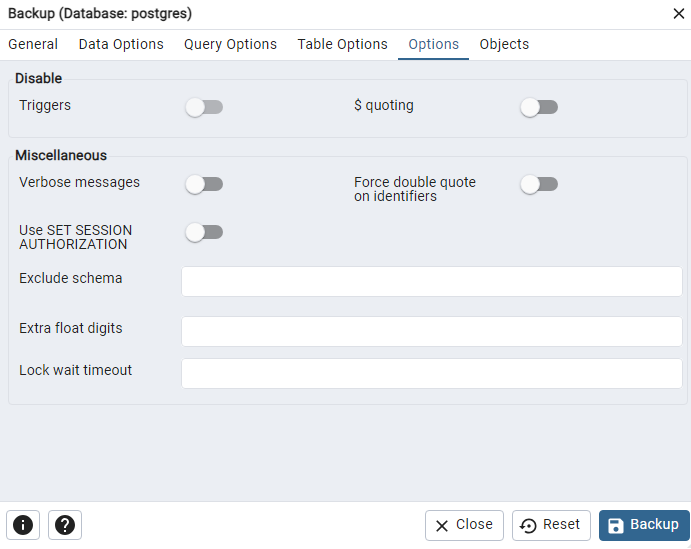
6. In the Options tab, disable "Verbose Messages".
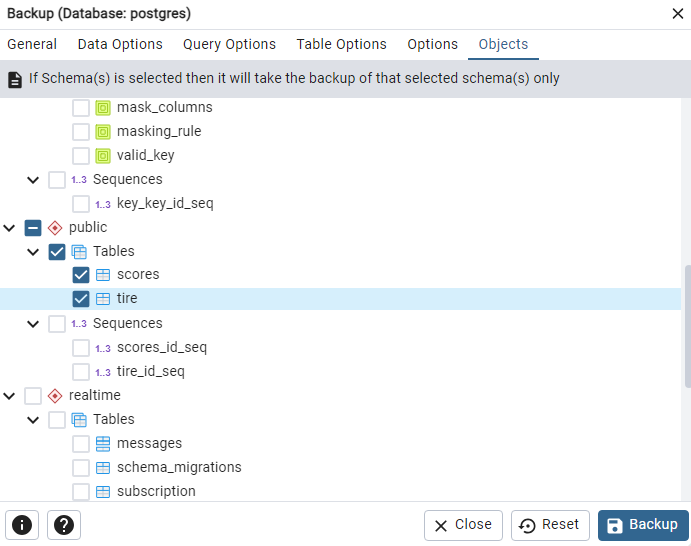
7. (Optional) To export specific tables, go to the Objects tab and select your desired tables.
8. Click "Backup". Once complete, find your dump file in the location specified in Step 4. You can now use this file to import source tables through the Provably GUI.